
|

The following page was created with information supplied by Dan Odenweller. Thank you to Dan Odenweller for taking time to put together the chronology of Coleman Crew's Last Mission!
| 25 June 1944 Documents: |
|
 The following documents are offered in a PDF file format below. Adobe Reader is necessary to view and print PDF files. Please note the file size before downloading and opening the files. The following documents are offered in a PDF file format below. Adobe Reader is necessary to view and print PDF files. Please note the file size before downloading and opening the files.
|
Aircraft #598 piloted by Lt. Coleman, was attacked by enemy aircraft about a minute and a half after bombs away. Direct hits were scored by the enemy interceptors on #2 and #3 engines. The cockpit and bombardiers compartment were seen with flames coming out of the windows which had been shot out. The plane made a perfect loop, then fell off to the right in a spin and crashed in the water 2 miles South of the runway. They were strafed all the way down and also after hitting the water. No parachutes were seen and it is believed that all members of the crew are dead. Read more about the shoot down.
Chronology of Coleman Crew's Last Mission - 25 June 1944
Mission: Hit Yap Aerodrome at 1200/K on 25JUN44.
Formation: Formed up over Sorel Island, the Wing rendezvous point, then on to the IP, as a Squadrons in trail formation. The 5th BG flights, 72th BS - two 3-plane elements in a modified stagger, and the 394th BS - echeloned to the right in a modified stagger. The 307th BG two flights (370th and 372th BS in "Javelin Down" formation, within squadrons.
5th Bombardment Group (H) - Two Squadrons of 6 A/C ( 335, 639)
-
72th BS - Lead element (A/C 113, 280, etc.)
-
394th BS - Number 2 Position High
(A/C 110, 467, 594, etc.)
307th Bombardment Group (H) - Two Squadrons of 6 A/C ( 075, 542, )
-
370th BS -In trail behind 5th BG squadrons
(A/C 090(B-3), 147(A-1)
-
372th BS - In trail and 500 feet below 370th
(A/C 119, 567(A-2), 598, 599(A-1),
Target:
-
Yap Airdrome Runway and Revetment Area - Primary Target
- 5th BG - Runway
-
307th BG - Revetment Area
-
Yap Town - Alternate Target
-
Sorel Island Enemy Installations - Tertiary Target
Mission Chronology
5th BG Chronology
- Departed Momote between 0552 and 0611/K
-
At Yap between 1146 - 1147/K, from 10500 to 10800' T, on heading 300 True
-
At Sorol between 1129 - 1148/K, from 5300' T, 2 runs on heading 350 True, 1 run on 180 True
-
Landed Momote 1659 - 1811/K
307th BG Chronology
- Departed Mokerang between 0522 and 0607/K
-
At Yap between 1146 - 1148/K, from 11500 to 12200' T, on heading 255-260 Magnetic
-
At Sorel 1046 - 1048/K, from 8700' T, on heading 045 Magnetic, one on 225 Magnetic
-
Landed Mokerang
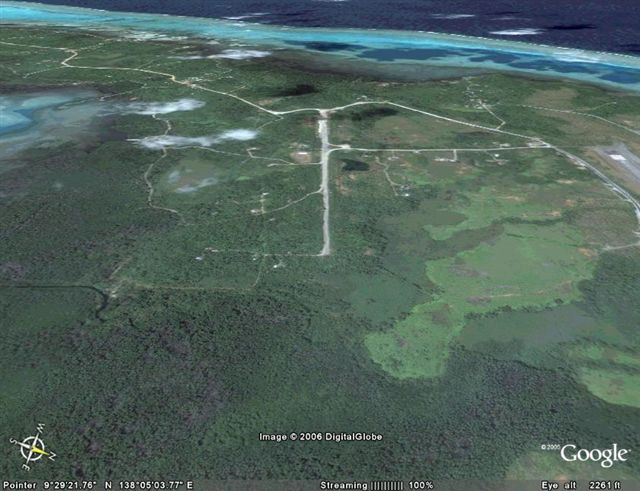
Sample Simulation of Mission using Google Earth:
The following simulation was put together by Walt Webb using the Google Earth application.
-
The plane approaches the (old) runway from the east (ENE). Google Earth tilt-mode.
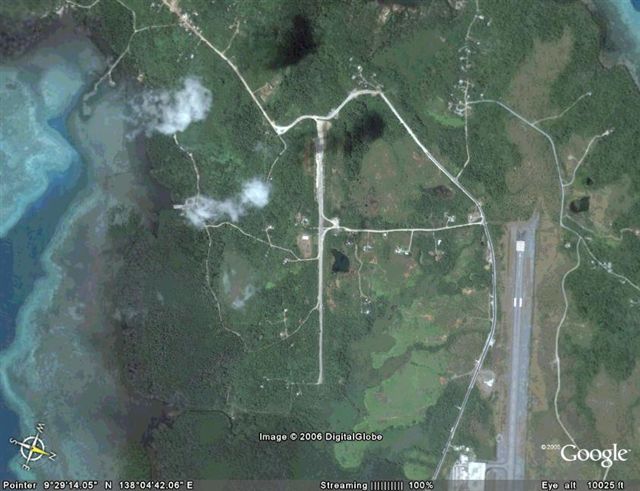
-
Vertical scene directly over the runway. (The Coleman plane drops its bombs on revetments along the north [right] side of the runway.)
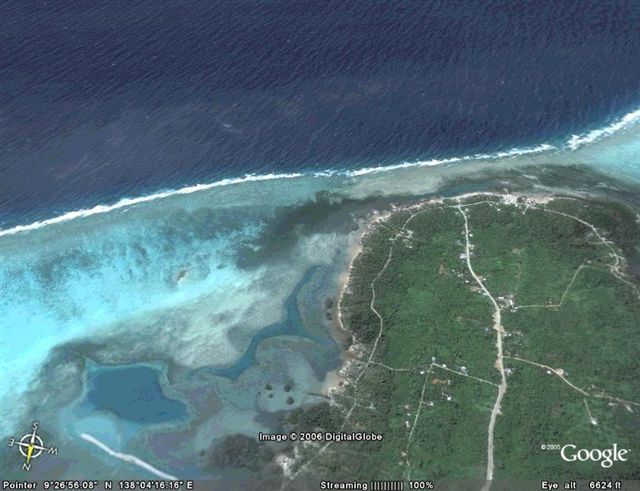
-
The plane exits the bomb run directly south toward the southern tip of the island. The reef edge can be seen just beyond. GE tilt-mode.
Mission Formation Map:
Submit comments about this site
Web Site Terms of Use: This web site authorizes you to view materials solely for your personal, non-commercial use. You may not sell or modify the material or reproduce, display, distribute, or otherwise use the material in any way for any public or commercial purpose without the written permission of the web site owner. pat@missingaircrew.com
|

|


 PIN IT